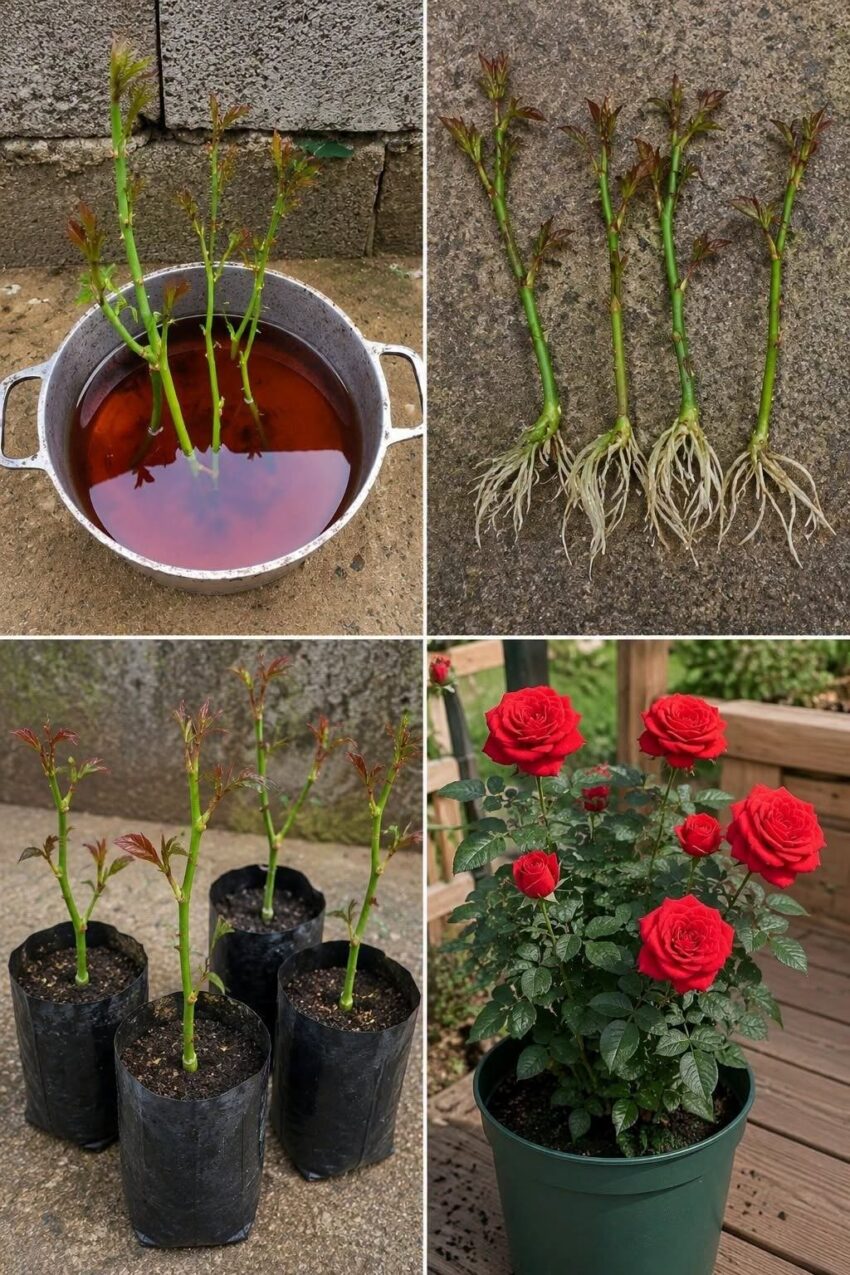
Here’s a detailed, practical recipe you can follow.
Grow Roses from Cuttings Easily with This 1-Cup Natural Trick
Growing a new rose plant from a cutting is an inexpensive way to multiply your favorite roses. With a healthy stem, clean tools, suitable potting medium, and a little patience, you can encourage the cutting to develop roots and eventually grow into a new rose plant.
This simple 1-cup honey-water method can be used as a gentle natural aid while propagating rose cuttings.
What You’ll Need
-
1 healthy rose stem, preferably about 6–8 inches long
-
1 cup (240 ml) of clean, lukewarm water
-
1 teaspoon pure honey
-
Clean, sharp pruning shears or a knife
-
Small pot with drainage holes
-
Well-draining potting mix
-
Clear plastic bag or a cut plastic bottle
-
Pencil or stick for making a planting hole
-
Optional: rooting hormone, if you want a more reliable propagation method
The 1-Cup Natural Mixture
Ingredients
-
1 cup lukewarm water
-
1 teaspoon honey
Preparation
-
Pour 1 cup of clean, lukewarm water into a clean container.
-
Add 1 teaspoon of honey.
-
Stir thoroughly until the honey is completely dissolved.
-
Let the mixture cool to room temperature if the water was warm.
Important: Don’t use hot water. Excessive heat can damage plant tissue.
Step 1: Choose the Right Rose Cutting
Select a healthy, disease-free rose plant.
The best cutting is usually taken from a stem that has recently flowered and is neither extremely soft and green nor very old and woody. A stem roughly the thickness of a pencil works well.
Look for a section with several leaf nodes—the points where leaves emerge from the stem.
Step 2: Prepare the Cutting
Using clean, sharp shears:
-
Cut a stem approximately 6–8 inches long.
-
Make the bottom cut just below a leaf node.
-
Remove the flowers or spent blooms.
-
Remove the leaves from the lower half of the cutting.
-
Leave 1–2 sets of leaves near the top.
-
Remove any large leaves that would make the cutting lose too much moisture.
Avoid crushing or tearing the stem.
Step 3: Use the Honey-Water Mixture
Place the prepared lower portion of the cutting into the honey-water mixture.
You only need to wet the lower portion of the stem. Don’t soak the entire cutting.
Allow it to sit in the solution for approximately 15–30 minutes.
Honey is sometimes used by gardeners as a natural propagation aid because of its antimicrobial properties, but it should not be considered a substitute for a commercial rooting hormone. The rose’s ability to produce roots depends much more on the condition of the cutting, humidity, temperature, moisture, and growing medium.
Step 4: Prepare the Pot
Fill a small pot with a loose, well-draining propagation medium.
A simple mixture is:
-
50% perlite
-
50% quality potting mix
Alternatively, you can use a commercial seed-starting or propagation mix.
Moisten the medium so that it is evenly damp but not soaking wet.
Step 5: Plant the Cutting
Use a pencil or stick to make a hole in the center of the pot.
This prevents the planting medium from scraping the treatment off the stem.
Insert the lower portion of the cutting into the hole, making sure that at least one or two leaf nodes are beneath the growing medium.
Gently press the soil around the stem so that it makes good contact.
Step 6: Create a Humid Environment
Cover the pot loosely with a transparent plastic bag or place a clear plastic bottle over the cutting.
This creates a miniature greenhouse and helps prevent the leaves from losing moisture before roots develop.
Keep the plastic from touching the leaves if possible.
Provide bright, indirect light.
Do not place the covered cutting in strong direct sunlight, because the temperature inside the enclosure can rise rapidly and damage the cutting.
Step 7: Keep the Soil Correctly Moist
Check the growing medium regularly.
It should remain slightly and consistently moist, not waterlogged.
If condensation becomes excessive, open the covering for a while to improve ventilation.
Overwatering is one of the easiest ways to cause a rose cutting to rot.
Step 8: Be Patient
Root development can take several weeks.
Depending on the rose variety and growing conditions, you may begin to see signs of successful rooting after roughly 4–8 weeks, although some cuttings take longer.
Don’t pull the cutting out to check for roots. This can break newly developing roots.
Instead, look for signs such as:
-
New leaf growth
-
The cutting remaining firm and green
-
Resistance when the stem is gently tugged
-
Continued healthy growth
New leaves alone don’t always prove that roots have formed, because a cutting can use stored energy to produce temporary growth.
Step 9: Move the New Rose Plant
Once the cutting has developed a healthy root system, gradually acclimate it to normal conditions.
If it has been growing under a plastic cover, remove the cover for increasingly longer periods over several days.
When the young plant is established, transplant it into a larger pot or into the garden.
Choose a location with good sunlight and well-drained soil.
Troubleshooting
The cutting turns black or mushy
This usually indicates excessive moisture, poor drainage, contaminated tools, or tissue damage.
Remove the affected cutting and start again with a fresh, healthy stem.
The leaves wilt
Some initial wilting can occur because the cutting has no established root system.
Increase humidity while avoiding waterlogged soil. A loose transparent cover can help.
The cutting produces leaves but no roots
This can happen. New leaves don’t necessarily mean successful rooting.
Give the cutting more time and avoid disturbing it.
Mold appears
Improve ventilation and reduce excess moisture. Remove severely affected plant material.
Always use clean pots, tools, and fresh propagation medium.
A More Reliable Alternative
If your goal is the highest possible rooting success, a commercial rooting hormone containing auxin is generally more reliable than honey water.
The honey-water method is best viewed as a simple natural experiment rather than a guaranteed rooting treatment.
For many gardeners, the most important factors are actually:
-
A healthy cutting
-
A clean cut
-
Good drainage
-
Consistent moisture
-
High humidity
-
Bright indirect light
-
Patience
Quick Recipe Summary
Natural 1-cup solution:
-
1 cup lukewarm water
-
1 teaspoon honey
-
Stir until dissolved
-
Dip or soak the lower part of the prepared cutting for 15–30 minutes
-
Plant in a moist, well-draining propagation medium
-
Cover to maintain humidity
-
Keep in bright, indirect light
-
Keep the medium moist but never waterlogged
-
Wait several weeks for rooting
Final Tip
Don’t judge the method by how quickly you see leaves. Root development is the real goal. A healthy rose cutting kept warm, humid, clean, and well-drained has a much better chance of becoming an established plant.
If you want, I can also turn this into a viral gardening article with a catchy headline, SEO introduction, FAQs, and Pinterest/Facebook-friendly wording.