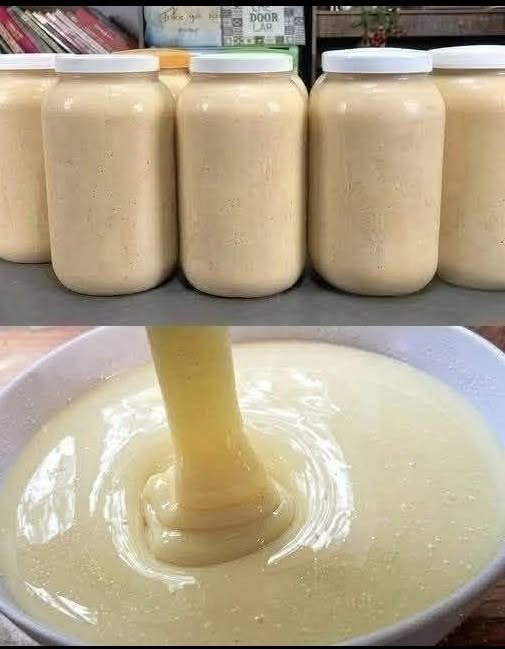
Homemade Sweetened Condensed Milk from Scratch


Making sweetened condensed milk at home is easy! You only need a few basic ingredients, a saucepan, and a little patience. The result is a rich, creamy, sweet milk that works beautifully in cakes, cookies, fudge, ice cream, tea, coffee, and Indian sweets.
This recipe uses regular milk and sugar, so you can make it completely from scratch without buying canned condensed milk.
Recipe at a glance
Total time
45–70 minutes
Difficulty
Easy
Yield
About 1 cup (240–300 ml)
Best method
Stovetop
Ingredients

2 cups (480 ml) whole milk
Full-fat milk gives the richest, creamiest result. Whole milk with around 3–4% fat is ideal.

⅔ cup (about 135 g) granulated sugar
Regular white sugar gives a clean, classic condensed-milk flavor.

1 teaspoon unsalted butter (optional)
Adds a little extra richness and shine. It is not necessary for traditional condensed milk.
Important: You do not need flour, cornstarch, milk powder, or condensed-milk flavoring for this recipe. The milk thickens naturally as water evaporates.
Step-by-step instructions

Step 1: Prepare the milk
Pour 2 cups of whole milk into a clean, heavy-bottomed saucepan.
Use a pan that is larger than the quantity of milk so you can stir comfortably and reduce the risk of boiling over.

Step 2: Add the sugar
Add ⅔ cup sugar to the milk and stir until it begins to dissolve.
You can stir over low heat for 1–2 minutes. There is no need to caramelize the sugar.

Step 3: Heat gently
Place the pan over medium-low heat and bring the mixture to a gentle simmer.
Do not let it boil vigorously. Once you see small bubbles around the edges, reduce the heat to low.

Step 4: Simmer and reduce
Let the milk simmer gently for approximately 35–55 minutes, stirring frequently.
-
Scrape the bottom and corners of the pan to prevent scorching.
-
Stir more frequently as the mixture thickens.
-
Keep the heat low enough that the milk does not brown or stick.
The exact time depends on the pan’s width, the heat level, and the amount of evaporation.

Step 5: Check the consistency
The milk should become slightly ivory-colored, glossy, and noticeably thicker than ordinary milk.
Dip a spoon into the mixture. It should coat the back of the spoon rather than run off like plain milk.
Stop cooking when you have about 1 to 1¼ cups remaining. It will thicken further as it cools.

Step 6: Add optional butter
Turn off the heat. If using butter, stir in 1 teaspoon until fully melted and incorporated.
This gives the finished mixture a slightly richer mouthfeel, although the recipe works without it.

Step 7: Cool and store
Let the condensed milk cool in the pan for about 10–15 minutes, then transfer it to a clean, heat-safe container.
Once it has cooled, seal the container and refrigerate promptly. The mixture will become thicker and creamier as it chills.
How to know when it is ready

Look for these signs:
-
Color: Creamy white to pale ivory.
-
Texture: Smooth, glossy, and thicker than regular milk.
-
Spoon test: It coats the back of a spoon.
-
Consistency when warm: It should still flow slowly; it should not be as thick as caramel.
-
After chilling: It becomes thicker and more syrupy.
The most important tip: Do not cook it until it looks as thick as canned condensed milk while it is still hot. Over-reduction can make it too thick, sticky, or grainy after refrigeration.
Tips for the best homemade condensed milk
-
Use whole milk: Low-fat milk generally produces a thinner, less creamy result.
-
Choose a heavy-bottomed pan: It distributes heat more evenly and helps prevent burning.
-
Keep the simmer gentle: High heat can scorch the milk or create an unpleasant cooked flavor.
-
Stir regularly: Pay special attention to the bottom of the pan as the liquid reduces.
-
Avoid adding extra sugar at the end: Sugar concentration increases as water evaporates.
-
Let it cool before judging the final thickness: The texture changes significantly during cooling.
Common problems and how to fix them
|
Problem |
Likely cause |
Solution |
|---|---|---|
|
Too thin |
Not enough water evaporated |
Simmer longer over low heat. |
|
Too thick or sticky |
Over-reduced |
Whisk in a little warm milk until smooth. |
|
Grainy texture |
Sugar crystallization or scorching |
Stir consistently and avoid high heat. Strain if needed. |
|
Brown color |
Heat was too high |
Reduce the heat and use a heavier pan next time. |
|
Skin on top |
Milk cooled uncovered |
Stir it back in while warm or remove it before storing. |
|
Milk sticks to the bottom |
Insufficient stirring or excessive heat |
Lower the heat and stir more frequently. |
How to store homemade sweetened condensed milk
-
Refrigerator: Store in a clean, airtight container and use within about 5–7 days for best quality.
-
Freezer: Freeze in a freezer-safe container in small portions for approximately 2–3 months for best quality. Thaw in the refrigerator and stir or whisk to restore the texture.
-
At room temperature: Do not store it at room temperature for extended periods. Homemade condensed milk has not been commercially sterilized or canned for shelf stability.
For food safety, refrigerate promptly, ideally within 2 hours of cooking, and keep the refrigerator at 40°F (4°C) or below.
How to use homemade sweetened condensed milk

Indian sweets
Use it in coconut ladoo, milk peda, barfi, and quick milk-based desserts. Adjust any additional sugar in your recipe because condensed milk is already sweet.

Ice cream
Combine with whipped cream and flavorings for a simple no-churn ice cream.

Fudge and desserts
Use in chocolate fudge, caramel-style desserts, and dessert bars. Because homemade batches vary in concentration, results may differ from recipes designed for canned condensed milk.

Tea and coffee
Stir in a small spoonful for a creamy, sweet finish.
Frequently asked questions
1. Can I make condensed milk without butter?
Yes. Butter is optional. Milk and sugar are the essential ingredients in this recipe.
2. Can I use brown sugar instead of white sugar?
Yes, but the condensed milk will have a darker color and a caramel-like flavor.
3. Can I make it with skim milk?
You can, but the result will generally be less creamy. Whole milk is preferable for a richer consistency.
4. Why is my homemade condensed milk thinner than the canned version?
It may need more reduction, or it may contain more water than the commercial product. Simmer it a little longer, then cool it before checking again. Keep in mind that homemade batches may not have exactly the same concentration as canned condensed milk.
5. Can I make a larger batch?
Yes. Double the ingredients, but use a wide, heavy-bottomed pan. The cooking time may increase, so judge by the final volume and texture rather than the clock alone.
6. Is evaporated milk the same as condensed milk?
No. Both are concentrated milk products, but sweetened condensed milk contains added sugar, while evaporated milk is unsweetened. This recipe produces sweetened condensed milk.
Quick recipe summary
Homemade Sweetened Condensed Milk
Makes approximately 1–1¼ cups
Ingredients
-
2 cups whole milk
-
⅔ cup granulated sugar
-
1 teaspoon unsalted butter (optional)
Method
-
Combine milk and sugar in a heavy-bottomed saucepan.
-
Heat gently until the sugar dissolves and the milk begins to simmer.
-
Reduce the heat to low and simmer for 35–55 minutes, stirring frequently.
-
Continue until reduced to approximately 1–1¼ cups and thick enough to coat a spoon.
-
Stir in optional butter, cool, and refrigerate in a clean, airtight container.
Storage: Refrigerate and use within about 5–7 days.
My recommendation: Start with the stovetop method above. It gives you the classic creamy flavor of sweetened condensed milk, uses everyday ingredients, and lets you control the sweetness and thickness for your favorite desserts.