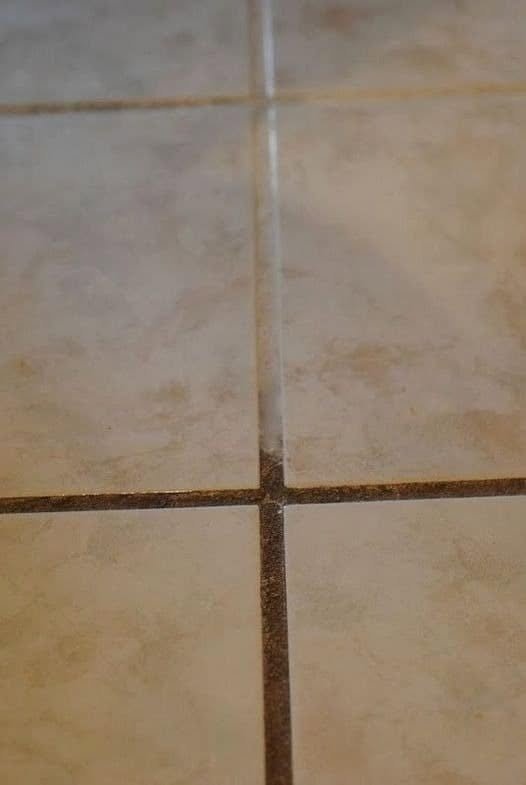
Tile grout can trap dirt, grease, soap scum, mold, and mildew over time, making even clean floors and walls look dirty. I tested three of the most popular grout-cleaning methods to see which worked best. Here’s a detailed guide on each method, including how to use it, its advantages, disadvantages, and best use cases.
How to Clean Tile Grout: I Tried 3 Popular Methods
Why Tile Grout Gets Dirty
Grout is a porous material, meaning it easily absorbs moisture, dirt, and stains. Common causes of dirty grout include:
- Foot traffic on tile floors
- Soap residue in bathrooms
- Cooking grease in kitchens
- Mold and mildew from humidity
- Hard water mineral deposits
Regular cleaning helps keep grout looking fresh and extends its lifespan.
Method 1: Baking Soda and Vinegar
This is one of the most recommended DIY cleaning methods.
What You’ll Need
- ½ cup baking soda
- White vinegar
- Small bowl
- Old toothbrush or grout brush
- Spray bottle
- Warm water
- Microfiber cloth
Step-by-Step Instructions
- Mix baking soda with a little water to make a thick paste.
- Spread the paste directly onto the grout lines.
- Fill a spray bottle with white vinegar.
- Spray the vinegar over the baking soda paste.
- The mixture will fizz for a few minutes.
- Wait 5–10 minutes.
- Scrub the grout using a toothbrush.
- Rinse with warm water.
- Wipe dry with a microfiber cloth.
Results
- Removed light dirt effectively.
- Brightened grout color.
- Worked well in bathrooms.
- Less effective on old, dark stains.
Pros
- Affordable
- Uses common household items
- Non-toxic
- Safe for most ceramic and porcelain tile
Cons
- Requires scrubbing
- Doesn’t completely remove deep stains
- Vinegar should not be used on natural stone surfaces
Overall Rating: ★★★★☆ (4/5)
Method 2: Hydrogen Peroxide and Baking Soda
This combination creates a stronger cleaning paste that is especially effective on stubborn stains.
What You’ll Need
- Hydrogen peroxide (3%)
- Baking soda
- Small bowl
- Toothbrush
- Rubber gloves
- Warm water
Step-by-Step Instructions
- Mix:
- ½ cup baking soda
- ¼ cup hydrogen peroxide
- Stir into a thick paste.
- Apply directly to grout.
- Leave for 10–15 minutes.
- Scrub thoroughly.
- Rinse with clean water.
- Dry the surface.
Results
- Removed years of grime.
- Significantly whitened grout.
- Excellent for kitchen floors.
- Lifted grease stains effectively.
Pros
- Powerful stain remover
- Great for white grout
- Removes mildew stains
- Easy to prepare
Cons
- May lighten colored grout if used frequently
- Requires gloves for sensitive skin
- Takes slightly longer than Method 1
Overall Rating: ★★★★★ (5/5)
Method 3: Commercial Grout Cleaner
Store-bought grout cleaners are formulated to remove heavy dirt, mold, and stains with minimal effort.
What You’ll Need
- Commercial grout cleaner
- Grout brush
- Gloves
- Sponge
- Warm water
Step-by-Step Instructions
- Read the manufacturer’s instructions.
- Apply the cleaner directly to the grout.
- Allow it to sit for the recommended time (usually 5–10 minutes).
- Scrub with a grout brush.
- Wipe away residue.
- Rinse thoroughly.
- Dry the surface.
Results
- Removed deep stains quickly.
- Little scrubbing required.
- Worked well on mold and mildew.
- Restored grout close to its original color.
Pros
- Fast
- Highly effective
- Removes stubborn stains
- Minimal effort
Cons
- More expensive than DIY methods
- Some products have strong chemical odors
- May require good ventilation
- Certain cleaners can be too harsh for delicate tile or grout if overused
Overall Rating: ★★★★★ (5/5)
Comparison Table
| Method | Cleaning Power | Cost | Effort | Best For |
|---|---|---|---|---|
| Baking Soda + Vinegar | Good | Low | Medium | Light dirt and regular maintenance |
| Hydrogen Peroxide + Baking Soda | Excellent | Low | Medium | Deep stains and whitening grout |
| Commercial Grout Cleaner | Excellent | Medium | Low | Heavy grime, mold, and fast results |
Tips for Better Grout Cleaning
- Vacuum or sweep floors before cleaning.
- Test any cleaner on a small, hidden area first.
- Use a grout brush instead of a metal brush to avoid damaging the grout.
- Rinse thoroughly after cleaning to remove residue.
- Dry the grout after cleaning to discourage mold growth.
- Apply a grout sealer every 1–2 years to help prevent future staining.
Which Method Worked Best?
After comparing all three methods:
- Hydrogen peroxide and baking soda delivered the best balance of cleaning power, affordability, and safety for tough stains.
- Commercial grout cleaner was the fastest and most effective for heavily soiled grout and mold but costs more.
- Baking soda and vinegar is an excellent choice for routine maintenance and light cleaning, though it may not remove deeply embedded stains.
Final Verdict
For everyday cleaning, a baking soda paste is a simple and budget-friendly option. For grout with years of built-up dirt, hydrogen peroxide and baking soda offer impressive results without the expense of specialized products. If you need the quickest solution for severe staining or mildew, a quality commercial grout cleaner can save time and effort. Whatever method you choose, regular maintenance and sealing the grout periodically will keep your tiled surfaces looking cleaner for longer.