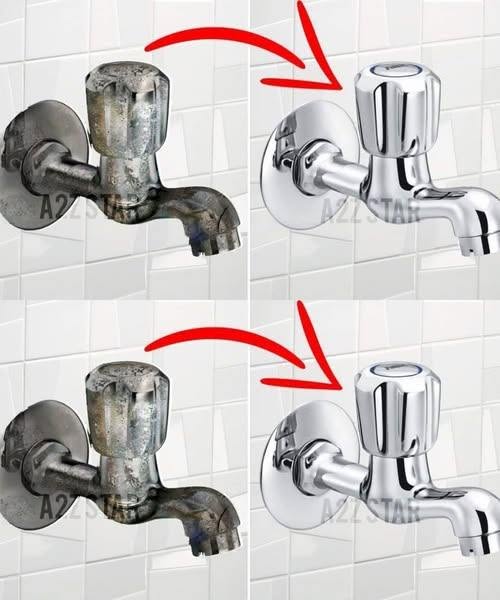
How to Clean and Restore Bathroom Faucets
Cleaning and restoring a bathroom faucet depends on whether you are dealing with mineral deposits, soap scum, rust, discoloration, dullness, clogged aerators, or a damaged finish. With the right method, many faucets that look old or neglected can be restored to a much better condition without replacing them.
1. Identify the faucet finish first
Before using any cleaner, determine what the faucet is made of or coated with:
- Chrome: Usually durable and shiny, but can develop water spots and mineral scale.
- Stainless steel: Resistant to rust, but can show fingerprints and mineral deposits.
- Brushed nickel: More sensitive to harsh chemicals and abrasive cleaners.
- Polished nickel: Attractive but relatively delicate; aggressive cleaners can damage the finish.
- Brass: May be lacquered, polished, or intentionally aged. The appropriate cleaning method varies.
- Matte black: Particularly vulnerable to scratching and chemical damage.
- Oil-rubbed bronze: Usually requires gentle cleaning to preserve its coating.
Important: If you don’t know the finish, start with the gentlest possible method—warm water, mild dish soap, and a soft microfiber cloth.
2. What you’ll need
For routine cleaning:
- Warm water
- Mild dishwashing liquid
- Several microfiber cloths
- Soft toothbrush or soft-bristled brush
- Non-abrasive sponge
- Small bowl
- Cotton swabs
For mineral deposits:
- White vinegar
- Plastic bag
- Rubber band or tape
For aerator cleaning:
- Adjustable wrench or pliers
- Cloth or masking tape to protect the faucet
- Small brush
- Vinegar
For restoration:
- Manufacturer-approved faucet cleaner, if available
- Replacement aerator, cartridge, or O-rings if necessary
Avoid
Do not automatically reach for:
- Steel wool
- Scouring pads
- Abrasive powders
- Bleach
- Ammonia
- Strong toilet-bowl cleaners
- Drain cleaner
- Harsh acidic cleaners
- Metal-polishing products unless they are specifically suitable for the faucet finish
Some of these can permanently remove plating or damage protective coatings.
3. Start with a basic cleaning
Step 1: Remove loose dirt
Run warm water over the faucet and wipe it with a clean microfiber cloth.
This removes dust, loose soap residue, and other particles that could otherwise scratch the surface while you clean it.
Step 2: Make a mild cleaning solution
Mix:
A few drops of mild dish soap + warm water
Dip a microfiber cloth into the solution and wring it out so it is damp rather than dripping.
Step 3: Wipe the entire faucet
Clean:
- Faucet body
- Spout
- Handles
- Base
- Around the handle joints
- Areas where the faucet meets the countertop or sink
For seams and tight spaces, use a soft toothbrush or cotton swab.
Step 4: Rinse
Use a clean damp cloth to remove all soap residue.
Step 5: Dry immediately
This is one of the most important steps.
Use a dry microfiber cloth to completely dry the faucet. Allowing water to evaporate on the surface leaves behind minerals that create water spots and scale.
4. Remove hard-water and mineral deposits
White, chalky buildup around the faucet is usually caused by minerals in hard water, particularly calcium and magnesium.
The vinegar method
For a faucet finish that is known to tolerate vinegar:
- Soak a cloth in white vinegar.
- Place it over the mineral deposits.
- Leave it for a short period.
- Remove the cloth.
- Gently wipe the softened deposits away.
- Rinse thoroughly with clean water.
- Dry completely.
For deposits around the end of the spout, you can sometimes place a small plastic bag containing vinegar over the spout and secure it with a rubber band.
However, don’t assume vinegar is safe for every faucet finish. Acidic cleaners can damage some finishes, especially certain decorative or specialty coatings.
For a delicate or unknown finish, use a manufacturer-approved descaler instead.
5. Clean the faucet aerator
A faucet that has weak, uneven, or spraying water may have a clogged aerator.
The aerator is the small screen or assembly at the end of the faucet spout.
Remove the aerator
- Put a cloth around the aerator.
- Carefully loosen it by hand.
- If necessary, use pliers or an adjustable wrench over the cloth.
- Turn slowly to avoid scratching the finish.
Some faucets use hidden or recessed aerators that require a special aerator key.
Clean it
Once removed:
- Rinse away loose debris.
- Inspect the screen.
- Soak compatible components in an appropriate descaling solution.
- Gently brush away softened deposits.
- Rinse thoroughly.
- Reassemble the aerator.
If the screen is badly corroded or damaged, replacing the aerator is usually easier than trying to restore it.
Reinstall
Screw the aerator back into the spout by hand first. Avoid cross-threading.
Tighten it gently—over-tightening can damage the threads or aerator.
6. Clean around the faucet base
The area where the faucet meets the sink is often overlooked.
It can accumulate:
- Soap
- Toothpaste
- Mineral deposits
- Grime
- Mold or mildew
- Old sealant
Use a damp microfiber cloth and soft toothbrush to clean around the base.
For stubborn deposits, use an appropriate cleaner for the faucet and countertop material.
Don’t scrape the area with a knife or metal tool. You can scratch the sink or damage the faucet’s finish.
7. Deal with rust
Rust requires special care because the solution depends on where the rust is located.
Surface rust on a suitable metal surface
If the manufacturer’s instructions permit it, use a mild rust-removal product designed for that particular finish.
Apply it to a cloth rather than aggressively scrubbing the faucet.
Rust coming from underneath the plating
If you see:
- Bubbling chrome
- Flaking
- Peeling
- Pitting
- Brown rust emerging through the finish
cleaning alone won’t restore the original finish.
The underlying metal or plating is damaged.
In this situation, you may need to:
- Replace the affected component, or
- Have the faucet professionally refinished.
8. Restore a dull chrome faucet
If chrome is intact but looks dull, the problem is often a combination of mineral deposits, soap film, and microscopic surface contamination.
Try this sequence:
- Wash with mild dish soap.
- Rinse thoroughly.
- Remove mineral deposits with a finish-compatible descaler.
- Rinse again.
- Dry completely with microfiber.
- Buff gently with a clean, dry microfiber cloth.
Avoid abrasive polishing compounds unless the faucet manufacturer specifically recommends them.
Do not use steel wool or abrasive pads. They can permanently scratch chrome.
9. Restore brushed nickel
Brushed nickel needs more caution than ordinary chrome.
Clean it with:
- Warm water
- Mild dish soap
- Soft microfiber cloth
Wipe in the direction of the brushed grain rather than scrubbing randomly.
Avoid aggressive rubbing and abrasive cleaners because they can alter the appearance of the brushed pattern.
If mineral deposits remain, check the faucet manufacturer’s cleaning instructions before using vinegar or another acidic cleaner.
10. Restore matte-black faucets
Matte-black finishes are especially important to clean gently.
Use:
- Warm water
- A small amount of mild dish soap
- Soft microfiber cloth
- Clean water
- Dry microfiber cloth
Don’t polish a matte-black faucet in an attempt to make it shiny. The matte appearance is part of the finish.
Avoid abrasive sponges, powders, steel wool, and strong chemicals.
11. Restore brass faucets
Brass requires identifying the type of finish before attempting restoration.
Lacquered brass
If the brass has a protective coating, aggressive polishing can damage the coating.
Use mild soap and water unless the manufacturer specifies another method.
Unlacquered/polished brass
The surface may naturally darken or develop a patina.
If you want to preserve the patina, clean gently.
If you want to restore a bright polished appearance, use a brass cleaner specifically appropriate for the faucet and follow the manufacturer’s instructions.
Test any product on a small inconspicuous area first.
12. Clean the handles and difficult areas
Faucet handles often have buildup around their edges.
Use a soft toothbrush dipped in diluted soapy water.
Gently work around:
- Handle seams
- Screw covers
- Escutcheons
- Handle bases
- Decorative grooves
Then wipe with clean water and dry.
Cotton swabs are useful for extremely narrow gaps.
13. If the faucet is leaking
Cleaning the exterior won’t fix a faucet that is leaking.
Common causes include:
- Worn cartridge
- Damaged ceramic cartridge
- Bad O-ring
- Worn washer
- Loose connection
- Corroded valve components
Typical symptoms
Leak from the spout when the faucet is off:
Often indicates a cartridge or valve problem.
Leak around the handle:
Could be an O-ring, cartridge, or seal problem.
Leak underneath the sink:
Could be a supply connection, hose, gasket, or faucet-body problem.
Before disassembling the faucet, shut off the water supply valves underneath the sink.
14. Replace a worn cartridge
Many modern single-handle faucets use cartridges.
The general procedure is:
- Shut off hot and cold water.
- Open the faucet to release pressure.
- Cover the drain so small parts cannot fall into it.
- Remove the handle.
- Remove the retaining clip, nut, or collar.
- Pull out the cartridge.
- Clean the valve body.
- Install the correct replacement cartridge.
- Reassemble the faucet.
- Turn the water back on slowly.
- Check for leaks.
Take the old cartridge with you when buying a replacement if you’re unsure of the model.
Different cartridges can look remarkably similar but are not interchangeable.
15. Replace damaged O-rings
O-rings are rubber seals that can become:
- Hard
- Cracked
- Flattened
- Brittle
A damaged O-ring can cause leaks around a spout or handle.
When replacing one:
- Match the replacement to the original size.
- Remove the old O-ring carefully.
- Clean the groove.
- Install the new O-ring.
- Use the lubricant recommended for plumbing seals/faucet components.
- Reassemble.
Don’t substitute random household lubricants; some products can damage rubber seals.
16. When cleaning won’t restore the faucet
Sometimes the faucet is beyond what household cleaning can fix.
Replacement or professional refinishing is more appropriate if you see:
- Deep scratches
- Pitting
- Peeling plating
- Blistering
- Severe corrosion
- Cracked components
- Broken handles
- Damaged threads
- Persistent leaks from a corroded faucet body
A cleaner can remove deposits, but it cannot restore missing plating or repair severely pitted metal.
17. A good restoration sequence
If you’re restoring an old bathroom faucet, I recommend this order:
Phase 1 — Inspection
Check the finish, leaks, corrosion, aerator, handles, and connections.
Phase 2 — Basic cleaning
Use warm water + mild dish soap + microfiber.
Phase 3 — Mineral removal
Use a finish-compatible descaler for hard-water deposits.
Phase 4 — Aerator
Remove, clean, inspect, and replace if necessary.
Phase 5 — Mechanical repairs
Replace worn cartridges, washers, O-rings, or other serviceable components.
Phase 6 — Final cleaning
Remove remaining soap and mineral residue.
Phase 7 — Drying
Completely dry the faucet.
Phase 8 — Final inspection
Check for leaks, scratches, corrosion, loose parts, and proper water flow.
18. How to keep the faucet clean afterward
The easiest restoration is the one you don’t have to repeat.
After using the sink:
- Wipe water from the faucet.
- Don’t allow toothpaste or soap to dry on it.
- Dry the base and handles.
- Clean the faucet with mild soap periodically.
- Deal with mineral deposits before they become thick scale.
- Clean the aerator when water flow becomes restricted.
- Avoid abrasive cleaning tools.
Simple maintenance schedule
| Frequency | Task |
|---|---|
| Daily/after use | Wipe away water |
| Weekly | Clean with mild soap and microfiber |
| Monthly | Inspect for mineral deposits and leaks |
| Every few months | Check aerator and water flow |
| As needed | Replace worn seals/cartridge |
Important safety rule
Always follow the faucet manufacturer’s cleaning instructions if you can identify the brand and model. The safest cleaner for one finish can damage another. In particular, don’t use vinegar, acidic descalers, abrasive cleaners, or metal polish on an unknown finish without first verifying compatibility.
If you tell me what your faucet looks like (chrome, brushed nickel, brass, matte black, etc.) and what problem it has—white scale, rust, dullness, peeling, low water pressure, or leaking—I can give you a specific step-by-step restoration procedure.