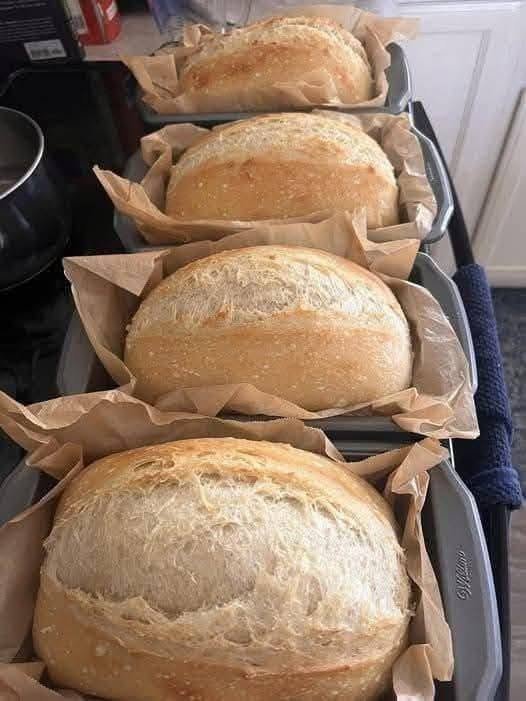
Here’s a simple, soft, fluffy sandwich bread that’s great for beginners and doesn’t require any fancy equipment.
Easy Homemade Sandwich Bread
Makes: 1 standard loaf
Prep + rise time: about 2½–3 hours
Bake time: 30–35 minutes
Pan: 9 × 5-inch loaf pan
Ingredients
- 3 cups (360 g) all-purpose flour or bread flour
- 1 cup (240 ml) warm milk
- 2¼ teaspoons (7 g) active dry yeast — 1 standard packet
- 2 tablespoons sugar
- 1 teaspoon salt
- 2 tablespoons (28 g) softened butter
- 1 tablespoon vegetable oil or melted butter, for greasing the pan
Important: The milk should feel warm, not hot—about 100–110°F (38–43°C). Very hot liquid can kill the yeast.
Step 1: Activate the yeast
Put the warm milk in a large mixing bowl.
Add:
- Sugar
- Yeast
Stir gently and let it sit for 5–10 minutes.
The mixture should become slightly foamy or bubbly. That tells you the yeast is active.
If nothing happens after about 10 minutes, your yeast may be inactive. It’s better to start again with fresh yeast than continue with a loaf that won’t rise.
Step 2: Make the dough
Add about 2½ cups (300 g) of the flour to the yeast mixture.
Add the salt and softened butter.
Mix with a wooden spoon or your hands until you have a shaggy, sticky dough.
Gradually add the remaining flour, a little at a time.
You may not need every last bit.
What you’re looking for
The dough should be:
- Soft
- Slightly tacky
- Smooth enough to handle
- Not wet or extremely sticky
Try not to add too much flour. A slightly sticky dough makes softer bread.
Step 3: Knead
Turn the dough onto a lightly floured surface.
Knead for approximately 8–10 minutes.
To knead:
- Push the dough away from you with the heel of your hand.
- Fold it back toward you.
- Turn it a little.
- Repeat.
After several minutes, the dough should become smoother and more elastic.
How to test it
Pinch off a small piece and gently stretch it.
If it can stretch fairly thin before tearing, the gluten has developed sufficiently. This is sometimes called the windowpane test.
Don’t worry if it isn’t perfect—the loaf will still work.
Step 4: First rise
Shape the dough into a ball.
Lightly grease your mixing bowl and place the dough inside.
Cover it with plastic wrap, a plate, or a clean damp kitchen towel.
Put it somewhere warm and let it rise for approximately 1–1½ hours.
You’re looking for the dough to become roughly double in size.
The exact time depends on the temperature of your kitchen. A cool room can take considerably longer.
Easy test
Gently press one finger into the dough.
If the indentation slowly springs back but doesn’t immediately disappear, it’s ready.
Step 5: Shape the loaf
Gently press the dough down to remove excess air.
Place it on a lightly floured surface.
Shape it into a rectangle roughly the length of your loaf pan.
Then:
- Fold the top third toward the center.
- Fold the bottom third upward.
- Roll the dough tightly into a log.
- Pinch the seam closed.
- Place it seam-side down in your greased loaf pan.
The dough should fit comfortably inside the pan.
Step 6: Second rise
Cover the pan loosely.
Let the dough rise again for about 30–60 minutes.
It should become noticeably puffy and rise to around 1 inch above the rim of the pan, although this can vary depending on your pan and dough.
While it is rising, preheat your oven to:
375°F (190°C)
Step 7: Bake
Place the loaf in the preheated oven.
Bake for approximately 30–35 minutes.
The top should be a beautiful golden brown.
If the top is browning too quickly, loosely cover it with aluminum foil for the remaining baking time.
How to tell when it’s done
The most reliable method is an instant-read thermometer: the center should be around 190–200°F (88–93°C).
Without a thermometer, carefully remove the loaf from the pan and tap the bottom. It should sound hollow rather than dense.
Step 8: Cool completely
Remove the bread from the pan and place it on a wire rack.
For the softest crust, brush the top with a little butter while it’s still warm.
Let it cool for at least 1 hour before slicing.
It can be tempting to cut into it immediately, but cooling allows the interior to finish setting. Cutting too early can give you a gummy texture.
Tips for really soft sandwich bread
- Don’t overload it with flour. This is probably the biggest mistake beginners make.
- Don’t skip the second rise. It helps produce a light, fluffy loaf.
- Don’t let it over-rise. If the dough rises dramatically and then collapses, it has probably fermented too long.
- Use warm, not hot, milk.
- For an especially soft loaf, substitute 2 tablespoons of the milk with heavy cream.
- Store completely cooled bread in an airtight bag or container at room temperature for about 3–4 days.
- You can freeze the sliced bread for roughly 2–3 months. Slice it before freezing so you can take out individual slices.
Quick version of the process
Mix → knead 8–10 min → rise 1–1½ hr → shape → rise 30–60 min → bake at 375°F for 30–35 min → cool.
For sandwiches, this gives you a soft, mildly sweet loaf with a tender crumb and sturdy enough slices for toast, grilled cheese, or everyday sandwiches.