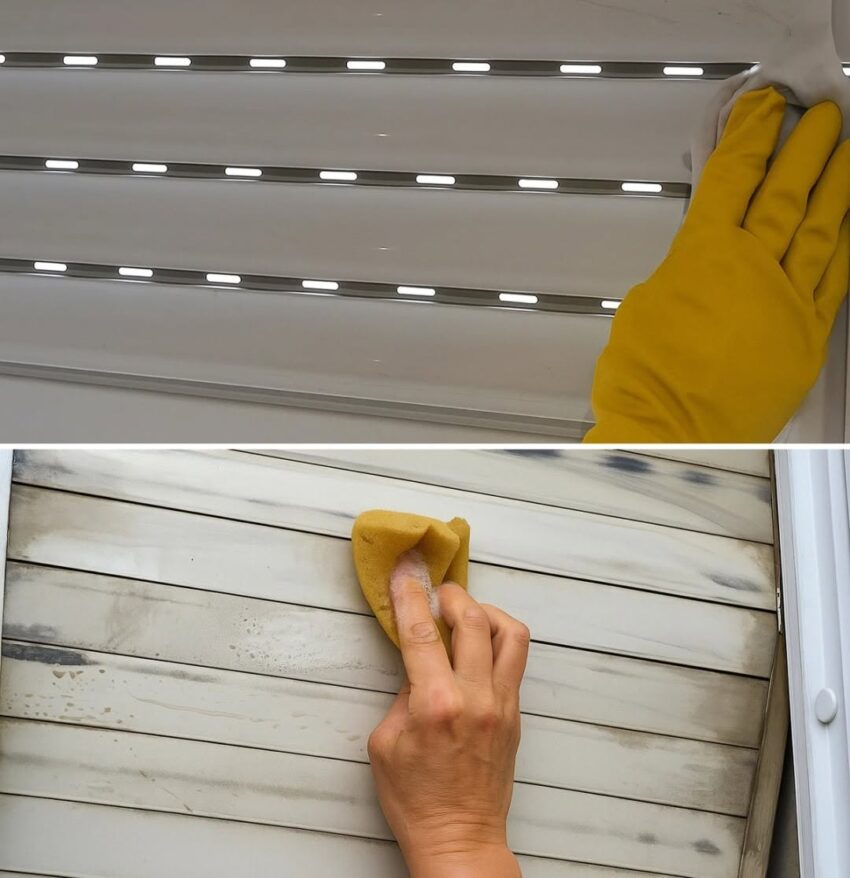
Here’s a detailed, practical guide to cleaning shutters so they look fresh, bright, and close to new again.
How to Clean Shutters and Make Them Look Brand New Again
Shutters can collect an impressive amount of dust, grease, fingerprints, and grime—especially around the slats, hinges, and edges. The good news is that you usually don’t need expensive cleaners or complicated equipment.
The real secret is simple: remove dry dust first, use a mild cleaning solution, avoid soaking the shutters, and dry them immediately.
What You’ll Need
- Microfiber cloths
- Soft-bristled brush or clean, soft toothbrush
- Vacuum cleaner with a soft brush attachment, if available
- Bucket or bowl
- Warm water
- A few drops of mild dishwashing liquid
- Clean, dry microfiber towels
- Cotton swabs for corners and hinges
- Optional: white vinegar
- Optional: old toothbrush for stubborn dirt
Avoid these cleaners
Unless the shutter manufacturer specifically recommends them, avoid:
- Bleach
- Strong bathroom cleaners
- Abrasive powders
- Steel wool or scouring pads
- Ammonia-heavy cleaners
- Solvent-based cleaners
- Excessive amounts of water
These can dull the finish, damage paint, discolor certain materials, or cause problems around hinges and joints.
Step 1: Identify What Your Shutters Are Made Of
This is important because different materials tolerate moisture differently.
Vinyl/PVC shutters
These are generally quite easy to clean and tolerate a little more moisture. However, you should still avoid flooding the surface.
Painted wood shutters
Be more careful. Wood can absorb moisture, and excessive water can cause swelling, peeling paint, or warping.
Composite/MDF shutters
Use a barely damp cloth, not a wet one. Avoid allowing water to sit on seams or edges.
Natural wood shutters
Use minimal moisture and dry them immediately. If the manufacturer specifies a particular wood-care product, follow those instructions.
If you aren’t sure what material you have, treat the shutters as painted wood: minimal moisture and gentle cleaning.
Step 2: Remove All the Loose Dust First
This is one of the most important steps.
Don’t immediately wipe dusty shutters with a wet cloth. Dust mixed with water can turn into a muddy film that is harder to remove.
Close the shutters and gently wipe or vacuum them.
Work from:
Top → middle → bottom
Then open them and clean the other side.
Pay particular attention to:
- Top edges
- Bottom edges
- Slats/louvres
- Corners
- Frame
- Hinges
- Areas around handles
A vacuum with a soft brush attachment is particularly useful because it lifts dust without scratching the finish.
Step 3: Make a Gentle Cleaning Solution
For ordinary household grime, you don’t need anything complicated.
Mix:
Warm water + a few drops of mild dish soap
The solution should feel lightly soapy, not heavily foamy.
You can also use a diluted vinegar solution for some hard surfaces, but I wouldn’t make vinegar your default cleaner for painted or natural-wood shutters. Certain finishes can react poorly to acidic cleaners.
Step 4: Clean the Slats One by One
This is where the biggest difference happens.
Dip your microfiber cloth into the cleaning solution and wring it out extremely well.
The cloth should be damp—not dripping.
Then wipe each louvre/slat individually.
A useful technique
Place the microfiber cloth around the slat and gently slide it from one end to the other.
This lets you clean both surfaces of the louvre more efficiently.
For plantation shutters with wide louvres, you can use your fingers to support the slat while wiping.
For narrow slats, a soft toothbrush can reach areas your fingers can’t.
Step 5: Don’t Forget the Edges
Many shutters look clean from a distance but still appear old because grime remains around the edges.
Clean:
- Inside corners
- Slat ends
- Vertical stiles
- Top rail
- Bottom rail
- Frame
- Around handles
- Around hinges
Use a cotton swab or soft toothbrush for narrow gaps.
For particularly dirty areas, let the damp cloth sit against the grime for a few seconds and then gently wipe it away.
Don’t aggressively scrub.
Step 6: Clean the Frame
The frame often collects a surprisingly large amount of dust.
First vacuum or dry-dust it.
Then use your damp microfiber cloth with the mild soap solution.
Work around the frame carefully, especially where it meets the wall.
If the wall around the shutter is also dirty, clean that separately so you don’t transfer wall grime back onto the shutter.
Step 7: Clean the Hinges and Hardware
Hinges, catches, handles, and other hardware can make otherwise clean shutters look neglected.
Use a slightly damp cloth to remove fingerprints and dirt.
For small crevices, use a dry or barely damp cotton swab.
Important
Don’t spray cleaning solution directly onto hinges or hardware.
Instead:
Spray/apply cleaner to the cloth → wipe the hardware → dry it.
This minimizes the chance of moisture getting into mechanisms.
Step 8: Dry Everything Immediately
This is especially important for wood and composite shutters.
After cleaning one section, wipe it with a clean, dry microfiber cloth.
Don’t leave water sitting on:
- Joints
- Edges
- Seams
- Hinges
- Bottom rails
For wood shutters, this step is essential.
The “Secret” to Making Them Look New Again
Cleaning removes dirt, but there’s another trick that makes a surprisingly big visual difference:
Use a final dry microfiber polish
Once the shutters are completely clean and dry, take a fresh, completely dry microfiber cloth and gently buff the surface.
Don’t use excessive pressure.
This removes tiny remaining streaks and gives the finish a more uniform appearance.
The result can make shutters look considerably fresher without applying furniture polish or oily products.
What About Very Dirty or Greasy Shutters?
If the shutters are in a kitchen or near a cooking area, ordinary dusting may not be enough.
Grease can create a sticky layer that traps dust.
Try this:
- Remove loose dust first.
- Mix warm water with a small amount of mild dish soap.
- Dip your microfiber cloth into the solution.
- Wring it out thoroughly.
- Wipe the greasy area.
- Repeat with a clean damp cloth if necessary.
- Dry immediately.
For stubborn grease, several gentle passes are safer than one aggressive scrubbing session.
How to Deal With Stubborn Spots
Fingerprints
Use a slightly damp microfiber cloth with mild soap.
Dried food or grime
Hold a warm, damp cloth over the spot briefly to soften it, then wipe gently.
Dust stuck in corners
Use a soft toothbrush.
Sticky residue
Try mild soapy water first. Don’t immediately reach for solvents.
Black marks
Gently wipe with a microfiber cloth. If they remain, test any stronger cleaner on a hidden area first.
A Very Important Tip: Test First
Before using any new cleaning product, test it on a small, inconspicuous section.
Wait until it dries.
Check for:
- Color change
- Cloudiness
- Loss of shine
- Paint damage
- Swelling
- Streaking
If everything looks normal, continue.
What NOT to Do
Some common cleaning methods can actually shorten the life of shutters.
Don’t hose them down
Even waterproof-looking shutters can have joints, hinges, or mechanisms that shouldn’t be flooded.
Don’t use a steam cleaner without manufacturer approval
Heat andThey can leave microscopic scratches that make the moisture can damage certain finishes, adhesives, coatings, and wood products.
Don’t use abrasive sponges
They can leave microscopic scratches that make the surface look dull.
Don’t use furniture polish automatically
Oily products can leave residue that attracts more dust.
Don’t scrub painted wood aggressively
You may remove or dull the finish rather than removing the dirt.
A Simple 15–20 Minute Cleaning Routine
For regular maintenance, you don’t need to deep-clean the shutters every time.
Weekly
- Dust or vacuum the shutters.
- Quickly wipe obvious fingerprints.
- Clean around handles.
Monthly
- Wipe the slats with a damp microfiber cloth.
- Clean the frame.
- Clean handles and hardware.
- Check corners and hinges.
Every few months
Perform a deeper cleaning:
- Dust thoroughly.This could be aging, sunlight exposure, smoke, cooking residue, or finish discoloration. Cleaning may improve it, but it may not completely reverse genuine discolor
- Wash slats with mild soapy water.
- Clean frames and edges.
- Detail corners with a soft toothbrush.
- Wipe with clean water.
- Dry completely.
- Buff with a dry microfiber cloth.
How to Make Old Shutters Look Significantly Better
If your shutters are clean but still look “old,” determine what’s actually causing the appearance.
If they’re dull
The finish may be worn rather than dirty. Cleaning harder won’t necessarily fix it.
If they’re yellowed
This could be aging, sunlight exposure, smoke, cooking residue, or finish discoloration. Cleaning may improve it, but it may not completely reverse genuine discoloration.
If the paint is peeling
Cleaning isn’t the solution. The surface may need preparation and repainting.
If they’re scratched
Light surface scratches may sometimes be improved with appropriate manufacturer-approved touch-up products, but don’t use abrasive polishing compounds indiscriminately.
If they’re warped
That’s generally a material or moisture problem rather than a cleaning problem.
The Best “Before and After” Method
If you’re doing a major cleaning project, use this order:
1. Photograph the shutters before cleaning.
2. Dust/vacuum thoroughly.
3. Clean from the top down.
4. Work one section at a time.
5. Use minimal moisture.
6. Dry each section immediately.
7. Inspect under bright natural light.
8. Go back over streaks with a clean, dry microfiber cloth.
Natural daylight is particularly good for spotting leftover streaks and grime.
The Simple Formula to Remember
Dust → Damp clean → Detail → Rinse/wipe → Dry → Buff
That’s really the secret.
You don’t need harsh chemicals to make most shutters look dramatically better. The combination of a soft microfiber cloth, a small amount of mild soap, very little water, and thorough drying is usually far more effective—and safer—than aggressive cleaning.
If you tell me whether your shutters are wood, PVC/vinyl, aluminum, or MDF/composite, I can also give you a material-specific deep-cleaning method, including exactly what to use and what to avoid.